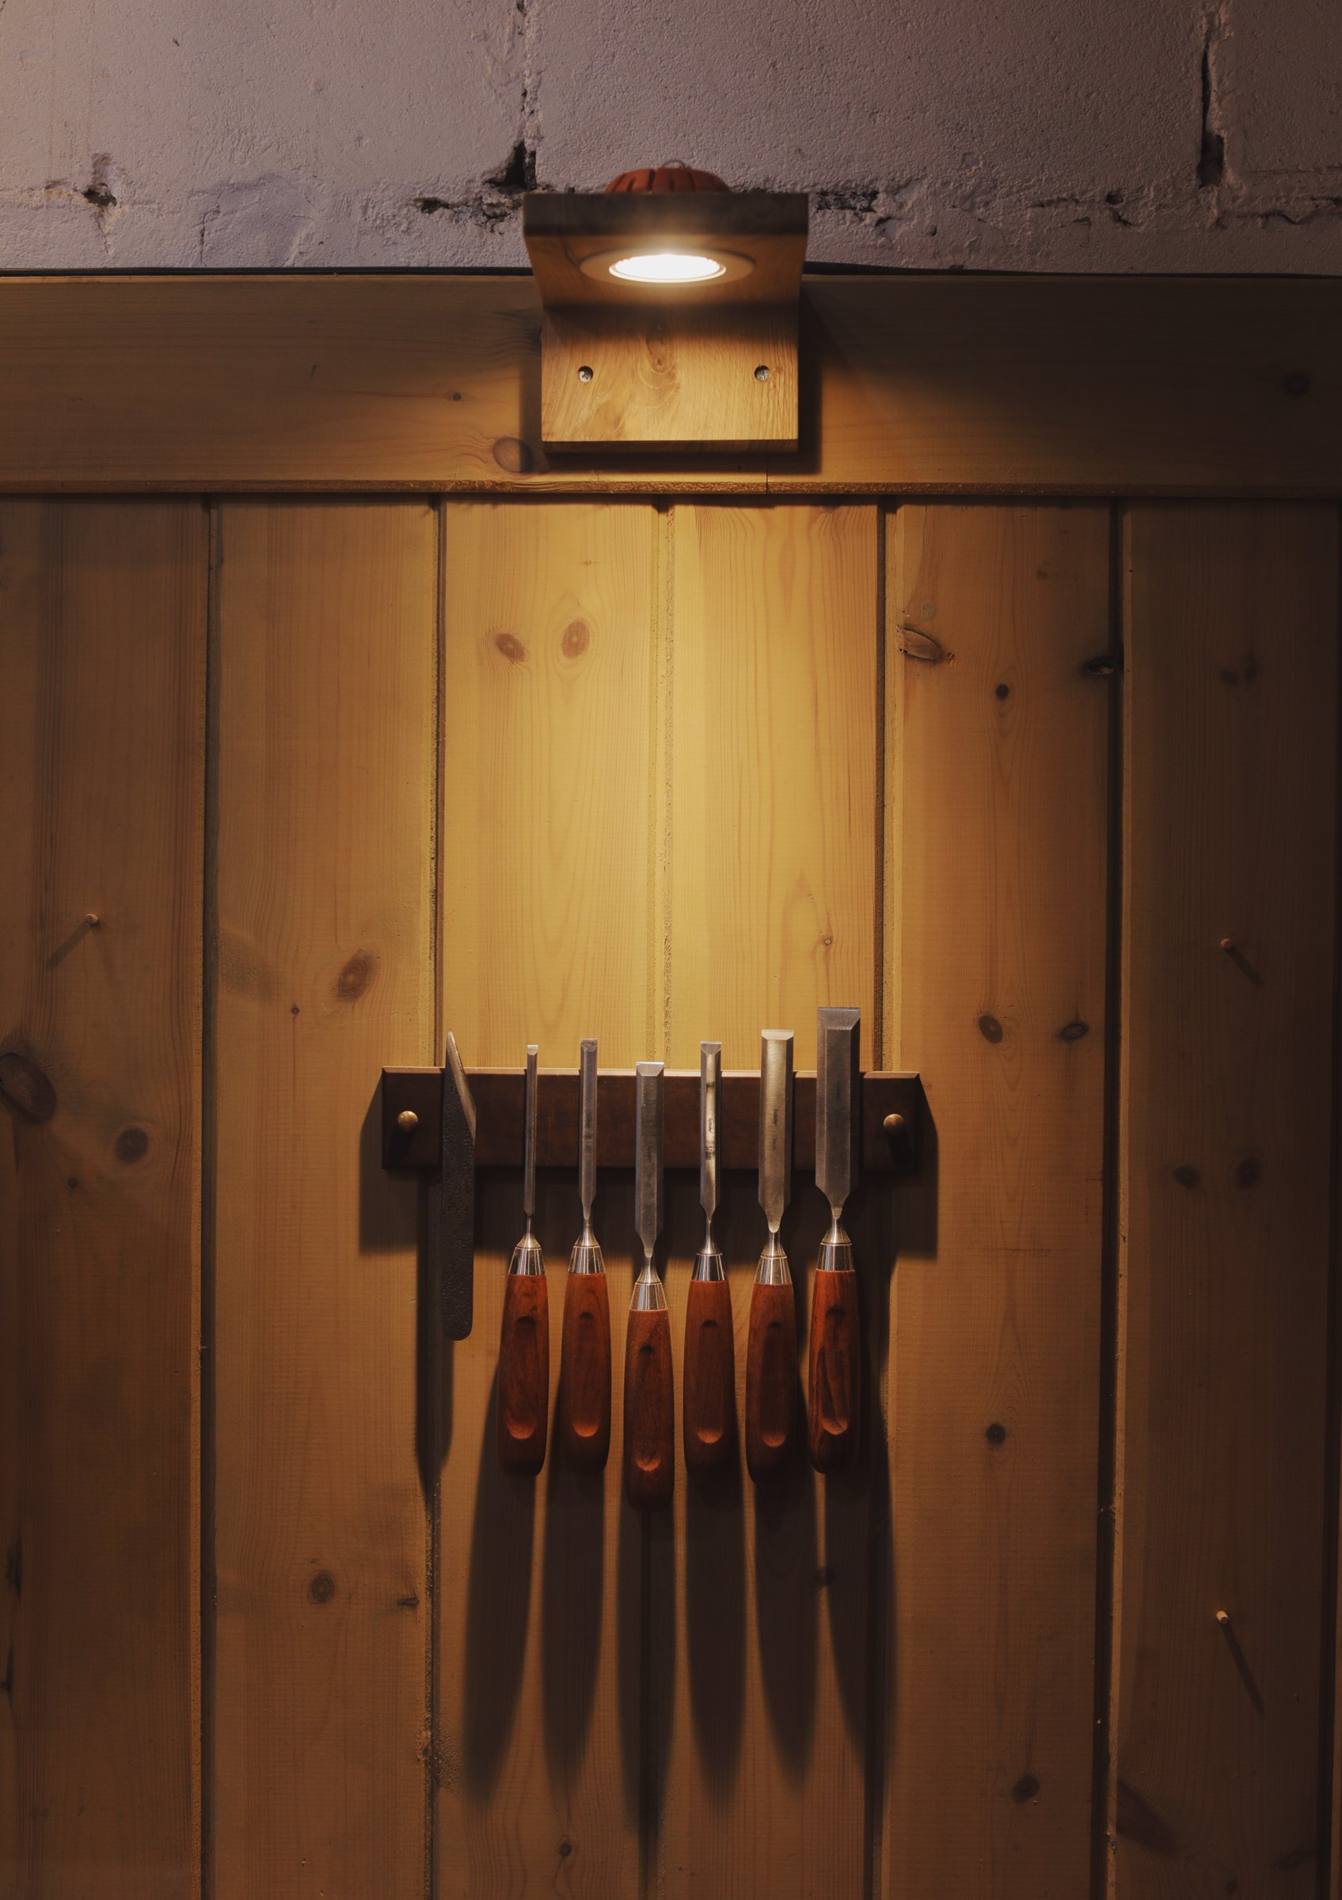
Maybe you're setting up a corner of the garage. Maybe your shop is already full, and you're wondering which of those tools you really need. Either way the questions are the same: which tools, from where, and how do you learn?
There is so much advice out there that it's easy to get lost. I'll try to draw the picture the way I see it. All rivers lead to the sea, and this is only the river I know. But it works, and I'm happy in it.
Before you buy anything
Buy only what you must, when the work asks for it, and according to the furniture you want to build. I know the joy of a new tool. But I've watched many people put serious money into tools that never ended up serving them, and that's a shame. (It isn't fatal. Good tools hold their value, and you can always sell.)
Money aside, there's something I love about building your kit slowly, at the pace of the work itself. You end up closer to your tools and to the craft, and you keep only what you really use. There's something clean in that. Add the fact that some tools you can make yourself (planes, chisels, carving knives; more on that below) and a different picture appears: things that are personal, intimate, not just bought. Like the furniture we build.
Look at my own bench and you won't find many tools. I have what I need, and here and there something special for one particular job. I'm not a collector. It pains me a little to see a tool gathering dust.
So start learning, and start making. On your own, if that's how you learn: my films are free on YouTube, and with time and experience you'll understand what you need. Or, if you want to go faster and deeper, with someone looking at your work: that is what this school is for.
The tools you gather that way become friends you made along the road. And your work gets better for it, because you understand how each one works and exactly what you need it for.
And still, there is a list.
These are the tools I can recommend, because I'm fairly sure that if you go seriously into fine woodworking, you will need them.
This is my experience, not an order to buy in. Pay attention to your own work, and buy what it asks for.
A note on machines
I work with machines too, and that spares me a whole family of specialized hand tools. To me my machines are tools every bit as wonderful as the hand tools. I feel just as connected to them, and I wouldn't give them up. The other side of it is that there are hand tools I've hardly touched, and I'm no authority on whether they're good or how to use them.
I understand people who choose to work without machines. But I think the dislike usually comes from a bad experience, from not understanding the mechanics, or from technique that wasn't right or safe. And of course, many people simply don't have the room.
The hand tools I do use, I know very well. I'm confident teaching them, and recommending the specific ones that, to my eye, everything else stands on.
In fairness: some of the links below go to Amazon. If you buy through them I receive a small commission, at no cost to you, and that is one way of repaying me for what I share here. As an Amazon Associate I earn from qualifying purchases. With every other maker and shop on this page I have no arrangement. Those are simply recommendations.
Your first course with me starts now, free.
You're already on the list. Come in →
The workbench
I often meet the wish to build a workbench as a first project. I understand it. It's a wonderful experience, and you get to choose everything: the size, the mass, the vises. Nearly every bench in history can be rebuilt today from detailed plans, with makers producing the right hardware.
And still, my teacher Robert Van Norman used to say: buy the bench, and start building furniture.
Partly because a bench is a big, awkward first project. Partly because good vise hardware is expensive, then there's the shipping, then your time, and before long a decent bought bench is the more economical choice. And beyond that, it takes time to learn how you like to work and which vises you really want. If you're going to build a bench, build it once you have some experience and know exactly what you need from it. That being said: if your heart is telling you to build one, go for it. Just put in some time at a bench first, and study the options.
What matters in a bench is mass and stability first, and then the ways it holds the work. I prefer the German style to the Scandinavian. The difference is in the vises: I like a tail vise. It holds the work in all sorts of ways, for planing boards and for precise work on small parts, joinery and carving.
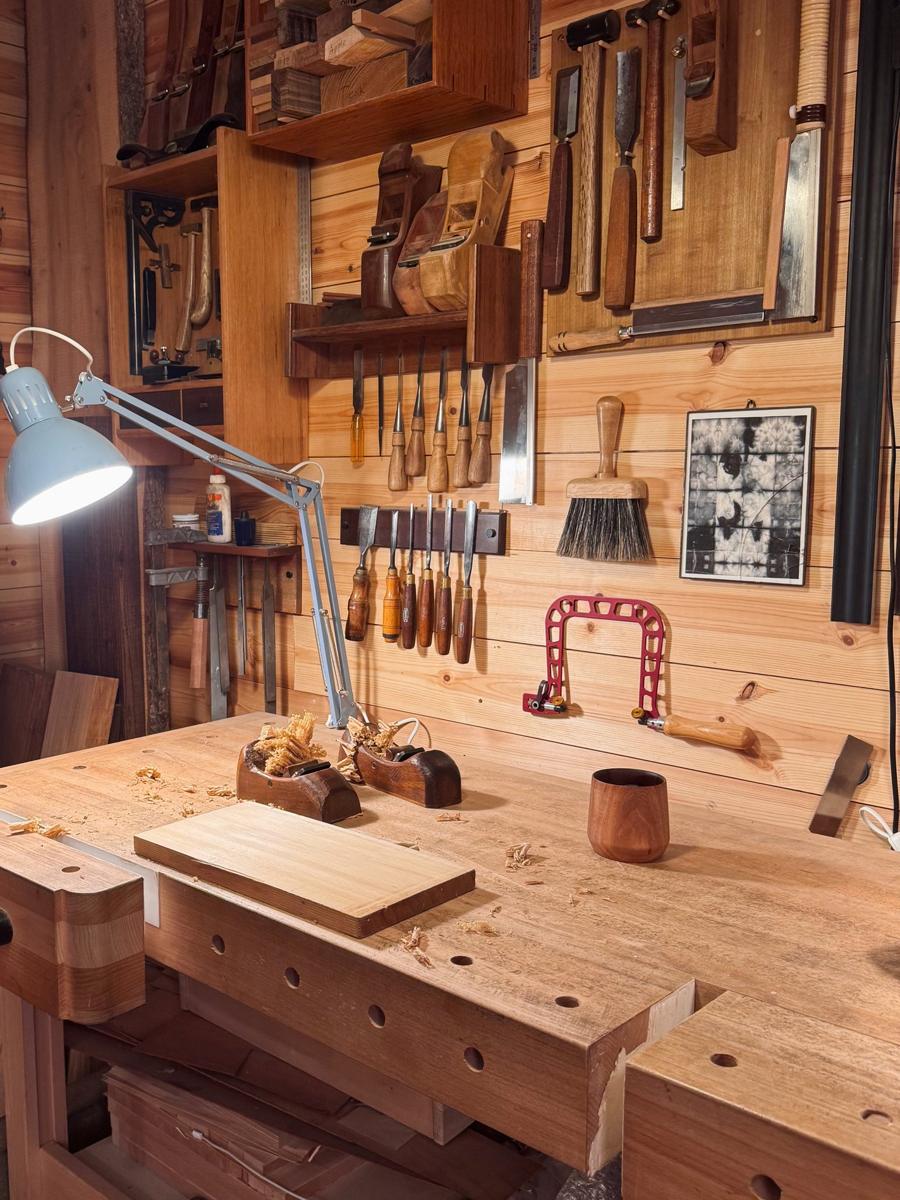
The benches in my shop are made by Hofmann & Hammer in Germany. Mine is their All-Round bench, with round dog holes, and I love it. Round bench dogs give you a lot of options, and there's no tool tray collecting every bit of rubbish, which means more working surface and a clean bench.
A used bench can be a bargain if it comes from a woodworker you trust and it's in good shape. Otherwise I wouldn't take on the adventure of flattening one. Most have had years of abuse, and sooner or later you hit a nail or some other strange piece of metal that wrecks your blade. I speak from experience.
Where to buy- Hofmann & Hammer All-Round WorkbenchHighland Woodworking · USThe bench I work on. About eighteen hundred dollars, and on backorder in October 2026: they take the order and ship when stock arrives.
Sharpening
At the moment the tool meets the wood, what decides whether the work is a pleasure and the result is good? Everything, but everything, starts with sharpening. If you're not friends with your sharpening station, your work simply won't be good.
Waterstones, 1000 and 8000
I recommend waterstones (rather than oilstones, diamond plates or sandpaper on glass), in 1000 and 8000 grit, as two separate stones if you can. Waterstones cut very fast. The drawback is that they wear, and need flattening now and then with a separate stone. I use a diamond plate for that, just below.
I'm a devoted fan of Norton. Nothing matches the feel, the speed and the result. They last, too: I sharpen a great deal, and my first set gave me about seven years. I've tried all sorts of combinations from mid-range and high-end makers and haven't yet found anything that compares. The 8000 especially. It costs a little more, and it is so worth it.
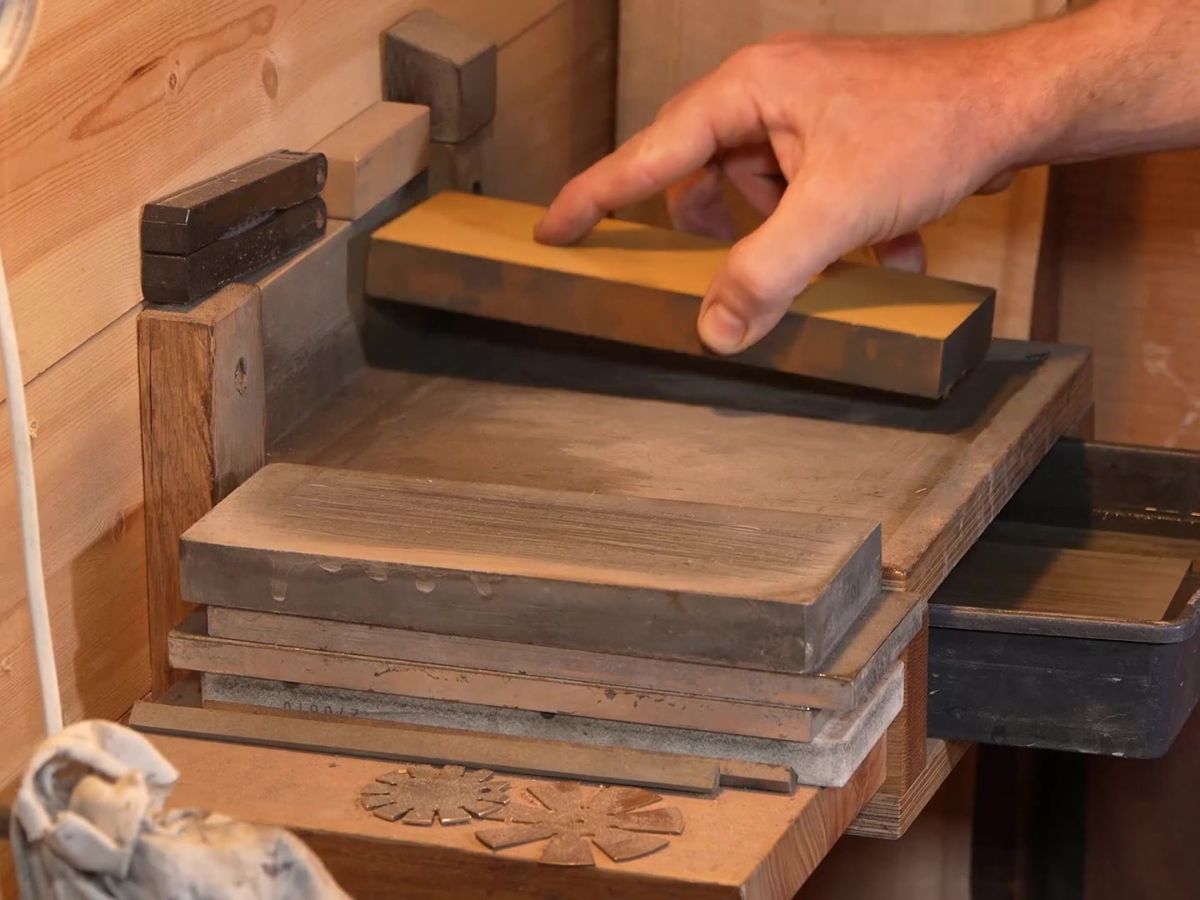
- Norton waterstone, 1000 gritAmazon
- Norton waterstone, 8000 gritAmazon
- Norton combination stone, 1000 / 8000AmazonOne stone with two faces. The right place to start if two stones are too much for now.
A diamond plate, to flatten the stones
Atoma, 400 grit. Without a flat stone there is no flat blade, so this one is a must. There are all sorts of stones and gadgets for flattening. In my experience this diamond plate is superb, and it lasts a very, very long time if you use it only for this.
I also keep a 140 grit, to speed things up when a waterstone is badly worn. You don't need it. I worked with the 400 alone for years.
Where to buyA grinder
Grinding means taking off a lot of steel, quickly, to set the angle of the bevel and remove most of the material. After that the waterstones have very little left to do, and good results come much more easily.
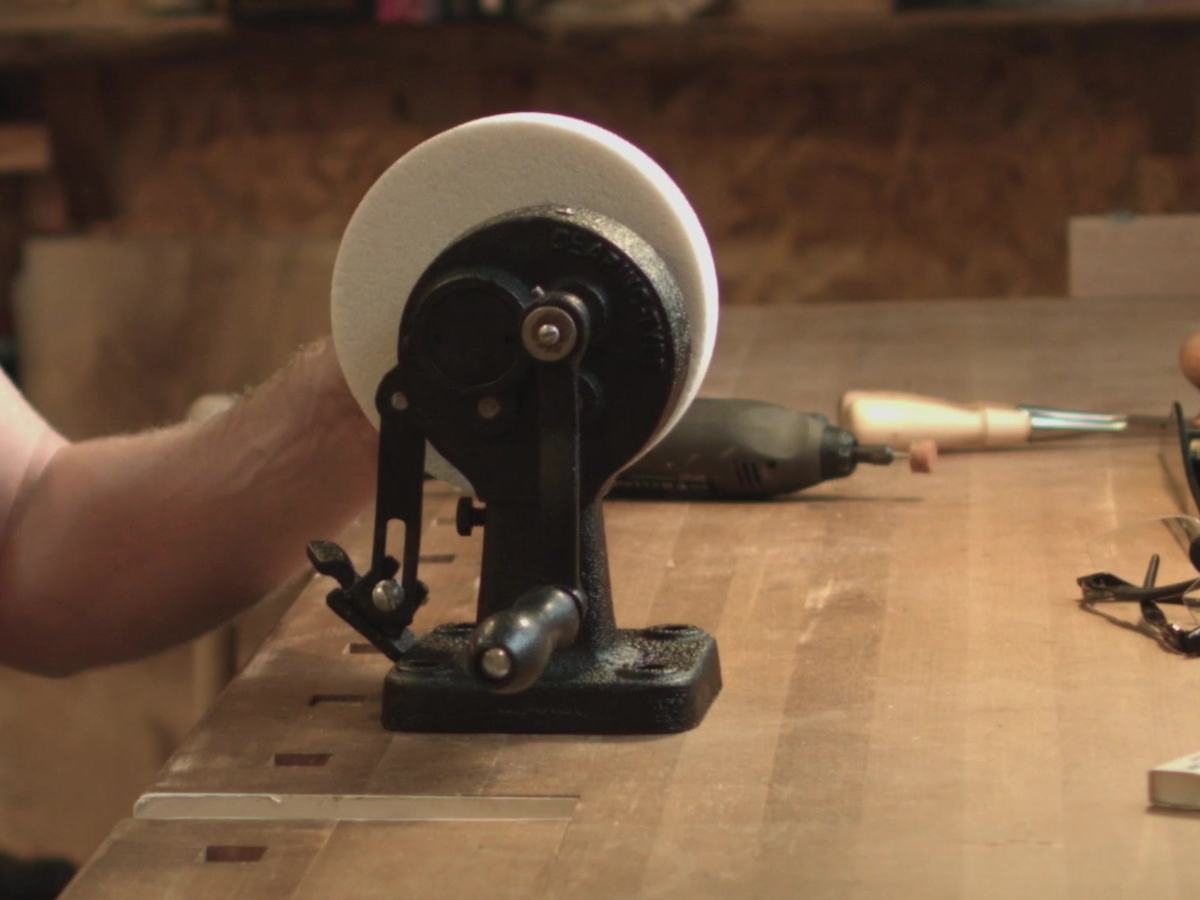
It's an inseparable part of the work. I started with a hand-cranked grinder: with a few adaptations you can work comfortably at any angle you like. The wheel wears with time, and needs truing and cleaning now and then with a small diamond dresser.
I enjoy the hand-cranked grinder, though some people find the coordination a challenge. It's a matter of practice, the learning curve isn't steep, and it pays off for years. It builds exactly the muscle we need: attention to small movements, and to what they do to the material. That serves us when we build furniture.
At some point I also brought in an electric grinder, for repairing chisel and plane blades that needed a lot of steel removed (it happens more in a shared shop like mine). It carries a CBN wheel instead of an ordinary stone. Mine is from Woodturners Wonders, made in the US, and it's great. You can grind on it for a long time without burning the temper of the steel, and it never needs truing. It stays that way for years.
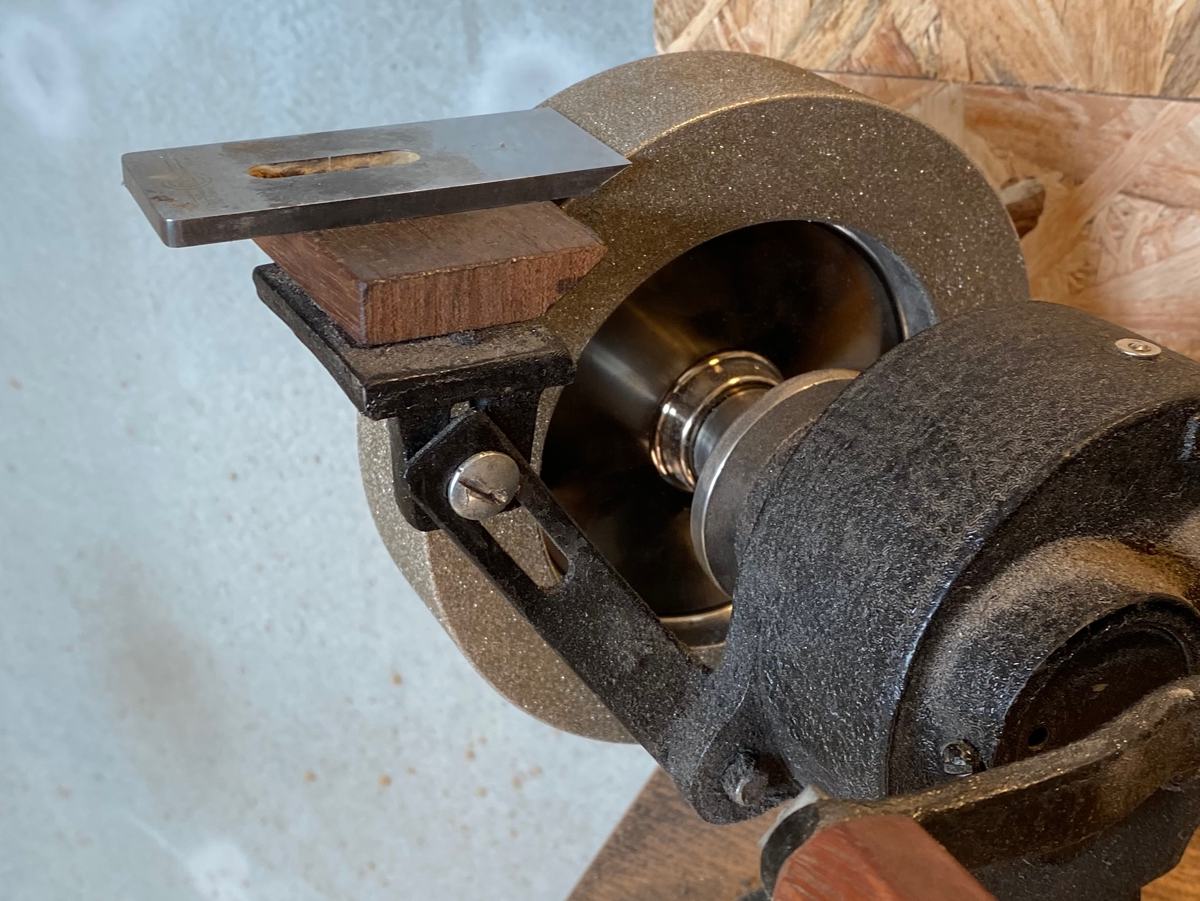
The truth is I like it so much that I use almost nothing else now. The hand-cranked one is still there. Some students prefer it, and sometimes so do I: for the nostalgia, for the quiet, and for the pleasure of working without electricity.
Where to buy- Woodturners Wonders Mega Square CBN wheel, 6 inchWoodturners Wonders · USThe one I have. 1½ inch wide.
- CBN grinding wheel, 80 grit, 1½ inch wideAmazonAnother option. Wide is good, and coarse is good: a lot of steel, fast.
Chisels
I'd go for a basic set of five sizes, something like ⅛, ¼, ⅜, ⅝ and ¾ inch. There are plenty of mid-range makers, but I wouldn't go for them. Invest in good chisels. It's worth it.
I work with Lie-Nielsen chisels, which are expensive and very good. Other makers work at that level, Veritas in Canada for one, though I haven't tried their chisels myself. I love the feel and the weight of the Lie-Nielsens.
Another good source is the secondhand market: flea markets, tool dealers, collectors, eBay. There are real finds from fine old makers. A chisel is, after all, a straight piece of steel fixed to a handle, with no moving parts to go wrong. It is a very common tool with a long history, and easy to find. But an old chisel, even from a good maker, will probably ask more preparation of you, especially in flattening the back.
Some of my chisels I made myself, by reworking old files and making a handle. Again: personal woodworking. When it works, these chisels are in no way behind special, expensive ones. And they're built exactly to my taste and my need.
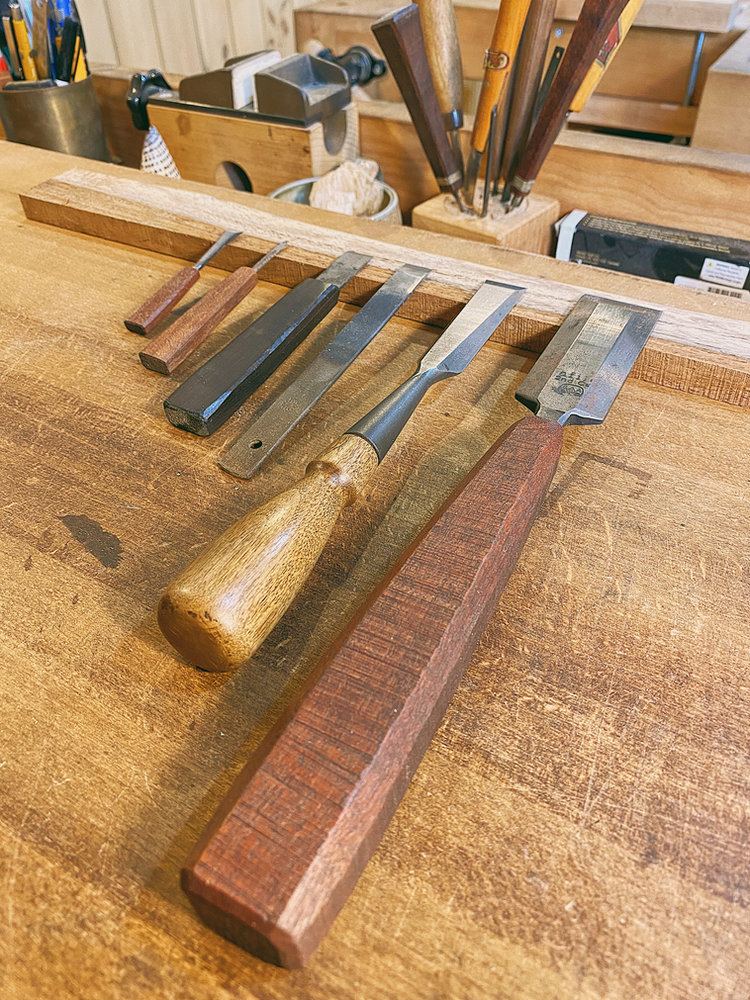
- Lie-Nielsen bevel edge chiselsLie-Nielsen · US
- Lie-Nielsen bevel edge chiselsClassic Hand Tools · UK
Planes
Block plane, No. 102
As small as it is, that's how versatile it is. From truing small surfaces, to trimming edges and end grain, to easing corners and cutting chamfers, this may be the plane I use most. The feel and the weight are wonderful in the hand, and you can work it with two hands or with one. Don't go for the replicas. Lie-Nielsen makes a wonderful plane, and it isn't expensive.
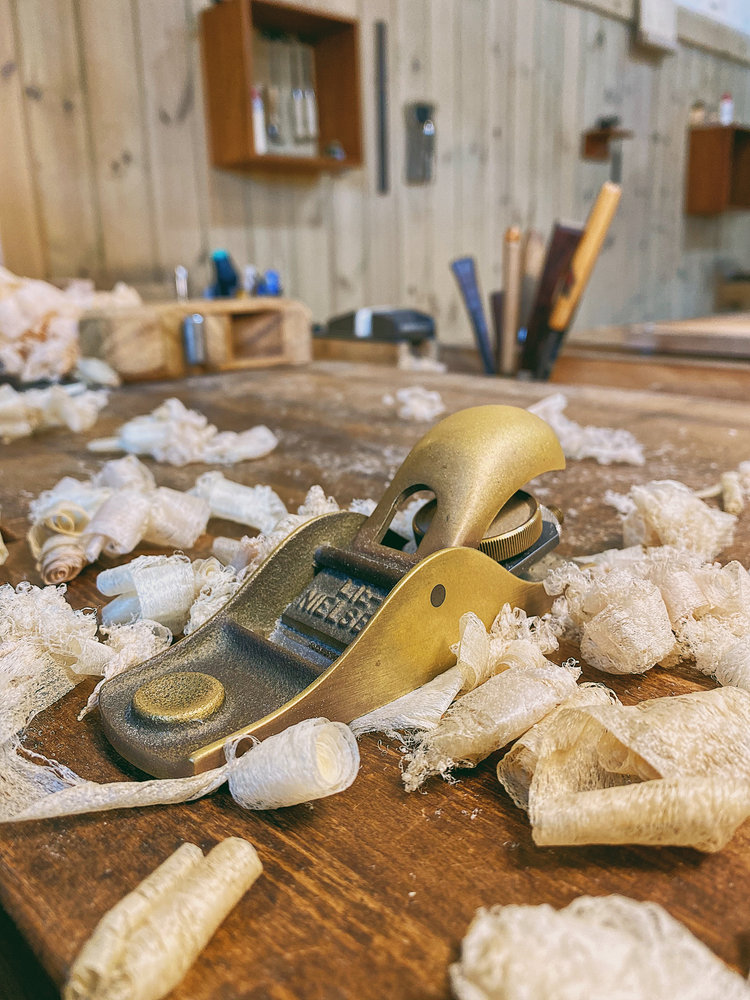
- No. 102 low angle block plane, bronzeLie-Nielsen · US
- No. 102 low angle block plane, bronzeClassic Hand Tools · UK
A small and important note: no blade arrives ready to use, not even from a very good maker. It has to be sharpened, and sharpened well. Every edge is two surfaces meeting, and we want both of them polished. That is the first stage of sharpening, and a very important one. Most people's disappointment with a new plane is disappointment with an unsharpened plane.
Block plane, No. 60½
More solid and heavier, and its mouth can be closed very tight in front of the blade. That holds the fibers down, so they don't lift and tear, even when you work against the grain. It's a feature that can't be overstated.
Its sides are also square to the sole, so you can use it on a shooting board. The 102 has a friendlier shape for one-handed work. Mine is a Lie-Nielsen. Dictum's version is a good one too, I think: a few of them serve my students when the 102 can't cope with the grain.
- No. 60½ adjustable mouth block planeLie-Nielsen · US
- No. 60½ block planeClassic Hand Tools · UK
A plane for general use
With all respect and love for the small planes, you need at least one larger plane too, for planing and truing surfaces. Long enough and wide enough for most of the sizes we work with, but not so long or wide that it turns clumsy.
Usually such a plane carries its blade bevel down, at about 45 degrees, with a chipbreaker. The Stanley No. 4 is the famous one. As a rule, the wider the plane, the more it's for smoothing. The narrower and longer, the more it's for jointing edges. Here too you can choose good mid-range, or a modern classic from Lie-Nielsen or Veritas.
I learned to build and to work with wooden planes in the Krenov style. Mostly for the comfort: wood in the hands, and a shape carved exactly to my hand and to the job. They carry Hock blades.
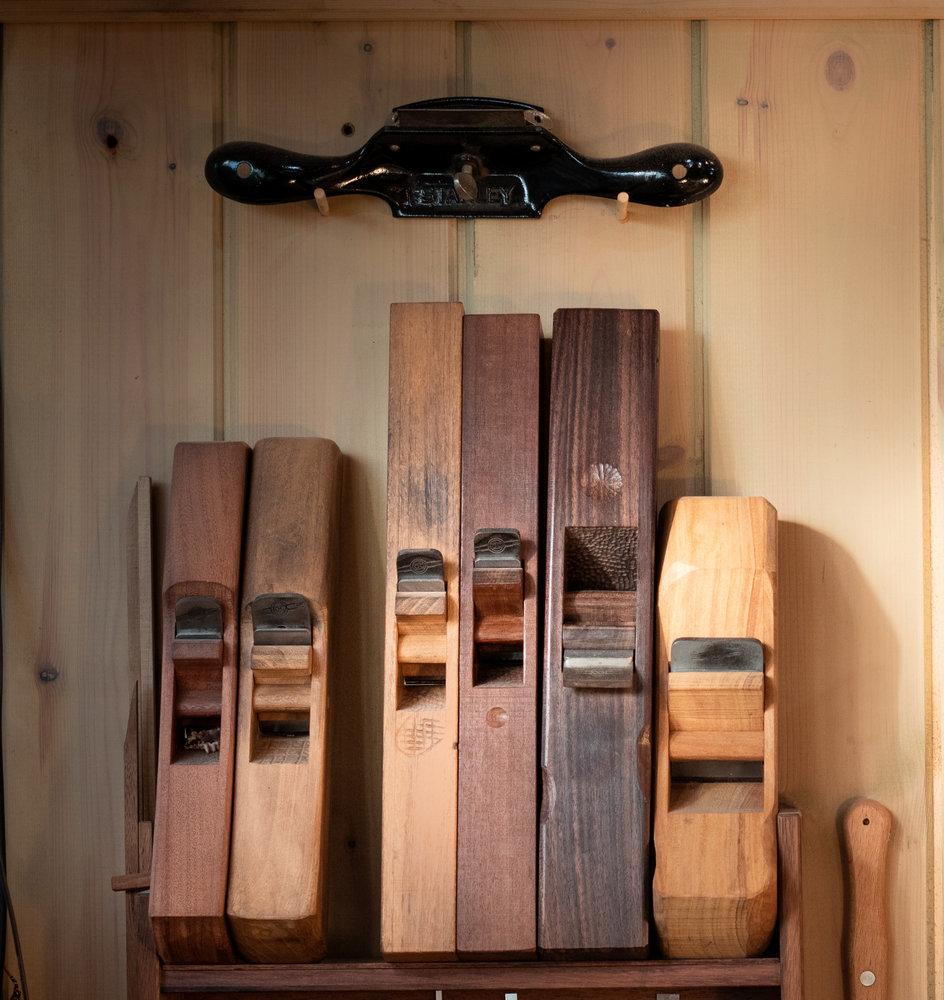
Students who stay with me for the long term usually build themselves a wooden plane in a good general size. I have about ten, in different sizes for different jobs, and each one has a character, and a story about the time when I made it. It's a more intimate way to own your tools, and I encourage it with a full heart.
And make no mistake: building your own is no sacrifice in quality. Maybe the opposite. Krenov called the plane the cabinetmaker's violin, the instrument that sets the tone for the whole orchestra.
The blade- Hock blades with chipbreakers, for wooden planesLee Valley · US, Canada
- Hock plane iron with chipbreaker, for wooden planesHighland Woodworking · US
- Hock Krenov bladesClassic Hand Tools · UK
A Krenov plane in twelve films, from the first cut to the first shavings, with shop notes for every film. You order the blade, a Hock 1½ or 1¾ inch wide, and find a piece of hard, dry wood. The rest we make together. Ask under any film, show me where you've got to, and I answer within 24 hours.
You're already on the list. Open the plane course →
Another option, and an easy one to reach these days, is a low-angle plane. What's wonderful about it is that you control the size of the mouth in front of the blade, and together with the option of honing at high angles, it can handle almost any difficult wood you choose to work. Which is amazing.
I have the Lie-Nielsen low-angle jack, No. 62, which is a great tool, and feels nice in the hand.
This past year I added, for my students, the low-angle smoothing plane from Melbourne Tool Company. It's a good, cheaper option next to the high-end Veritas and Lie-Nielsen planes, and I like that it isn't too long. (It isn't actually made in Australia, but the value for money is excellent.) It is absolutely a plane you could begin with as your only main plane, and carry on that way for years, until you really feel the need for something more.
I also recently got the Veritas custom smooth plane, which has both a chipbreaker and an adjustable mouth. I'm still learning it, but it's pretty exciting.
As for other sizes and special planes, I'd wait and see what I really need: the size of the furniture I'll be working on, which machines I'll use, if any, and so on.
Where to buy- Lie-Nielsen No. 62 low angle jack planeLie-Nielsen · US
- Melbourne Tool Company low angle smoothing planeAmazon
- Veritas custom #4 smooth planeLee Valley · US, Canada
Hammers
A hammer for adjusting planes
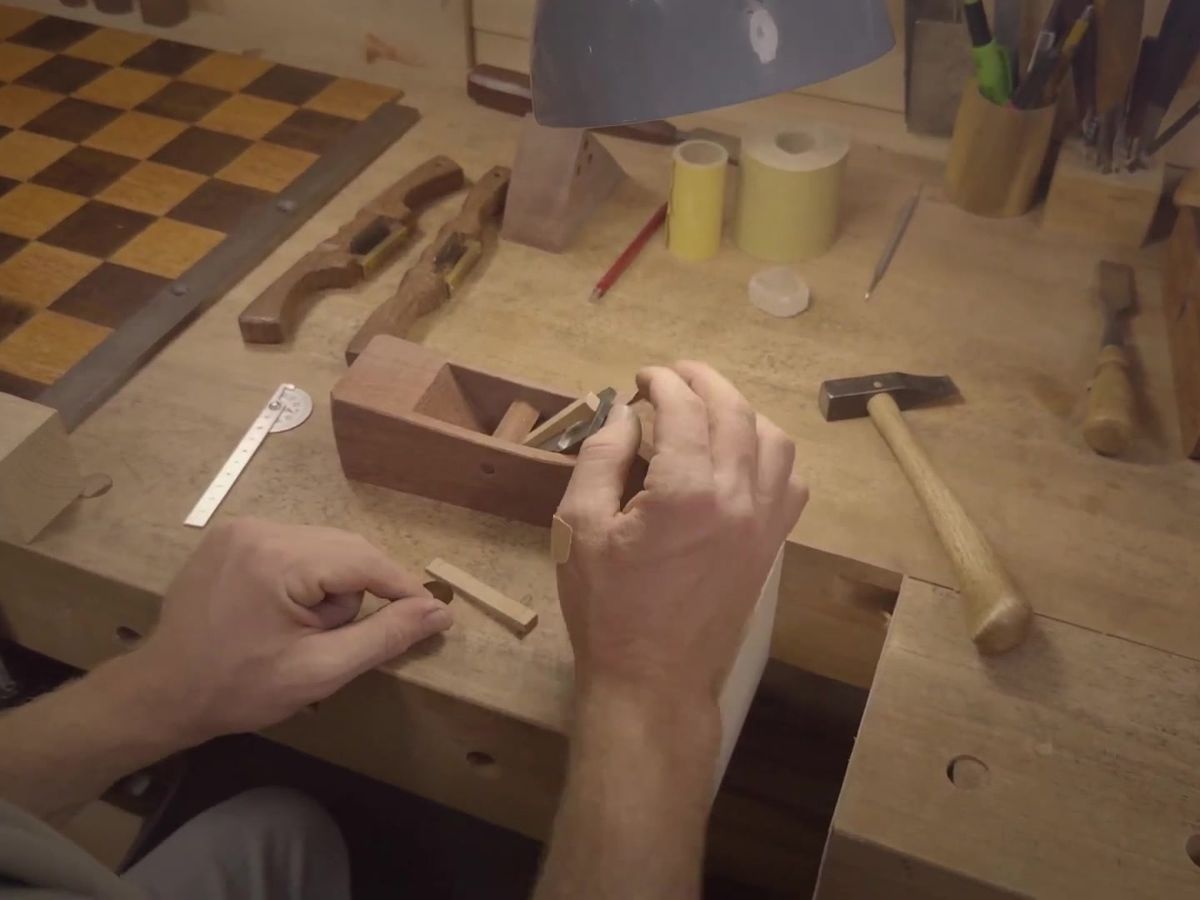
There are all kinds, Western and Japanese. It's also common to make one yourself. I've made quite a few, with heads of steel or brass. In the end it's a small hammer that is comfortable for tapping the blade, to set the depth of cut, or to even out the two sides so the plane cuts parallel.
Some have a screwdriver at one end for the chipbreaker screw, which is very handy, and to me better than the separate screwdrivers you can buy. I use an excellent hammer made by Glen-Drake Toolworks in California. There are cheaper ones too, though you usually have to file a little off the screwdriver end, so that it's thin enough for the slot of the chipbreaker screw.
A hammer for chisels
Broadly: something with mass, that gives good feedback when you strike a chisel to cut a joint. I like the Japanese hammers. They're made of steel, and gather the weight into a fairly small head, more than a Western mallet does. I use a 375 gram hammer, about 13 ounces. Anywhere between 300 and 500 grams is good.
I like the short, chubby style, rather than the ones with a longer head. There's more surface to hit the chisel with, which gives a better feel, and the mass is concentrated.
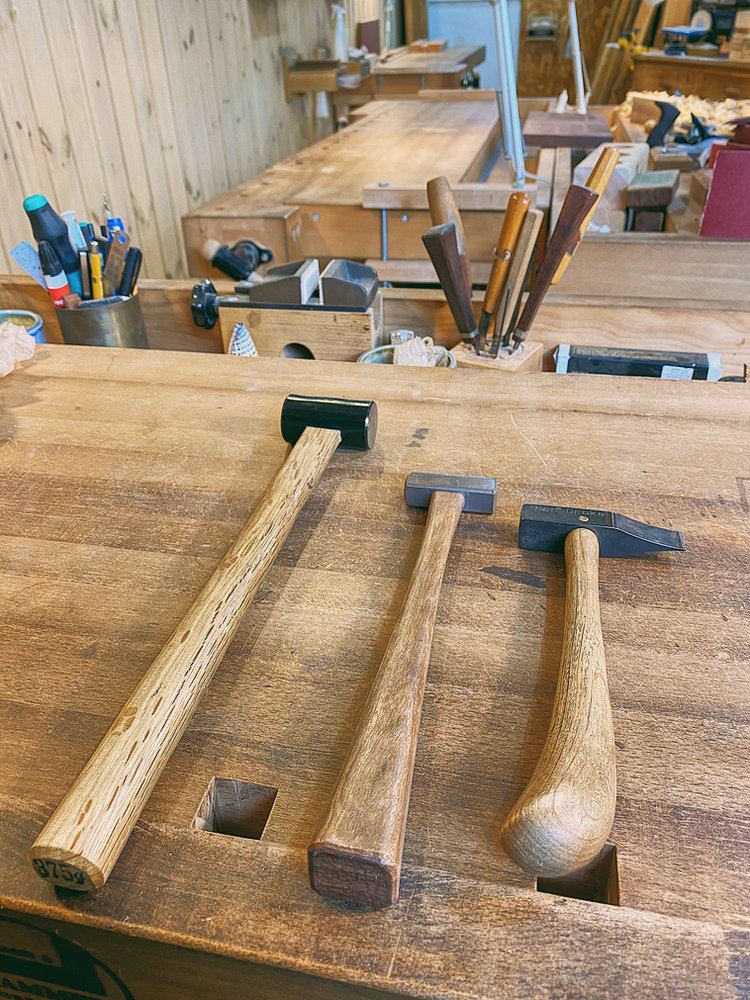
- Kakuri chisel hammer, 375 g (13 oz)AmazonThe short, chubby kind.
Squares and straightedges
A must, because I have to know whether things are straight, flat, and square. And if you're buying a square, buy an adjustable one. It opens up endless ways of marking and measuring, and the sliding rule is useful on its own in all sorts of situations.
I recommend the medium size, 6 inch, from Starrett, a maker of very high quality. There are cheaper options, but really, treat yourself here. Years of pleasure are guaranteed. The larger 12 inch serves me well too: its long rule is a great help in checking surfaces, edges, plane soles and everything else.
I use the metric versions myself, 150 and 300 mm, and those are my Amazon links below. The inch versions are listed beside them.
And then there is the one I love: Starrett's small double square, with a 2½ inch blade. At Inside Passage we called it the Little Buddy. It's super useful. I use the metric version. I also bought its narrow blade separately, and that thin blade is really useful for checking thin dovetails for square, or for measuring depth in small places. (I haven't found the narrow blade sold on its own lately. Starrett sells the square together with it, and with a bevel blade, as the 14D, or the 14MD in metric.)
For my students I once took a cheaper double square, and cut and ground its blade so it works the same way. It works well. But it's not the same as the Little Buddy.
A simple alternative is the little Shinwa square. It doesn't adjust, but it's easy to carry around the shop, for checking edges and small surfaces.
And if you want a cheap option that's still good: never buy from AliExpress or Temu. It isn't worth the pennies. I speak from experience. A student of mine found a twin pack by Faithfull, 6 and 12 inch, on Amazon in the UK at a very good price. I tried them myself, and they are not a bad option at all.
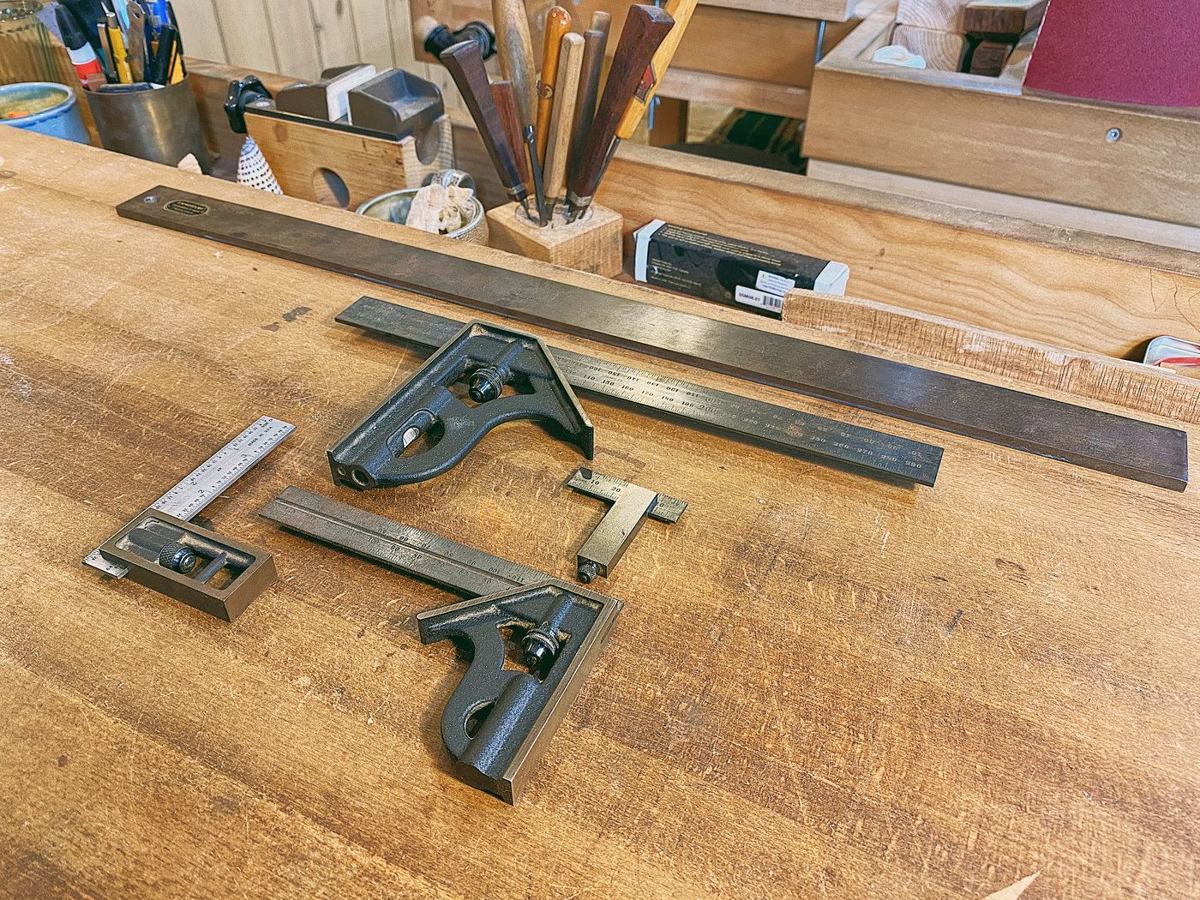
- Starrett double square, 150 mmAmazonMetric. The one I use.
- Starrett combination square, 300 mmAmazonMetric. The one I use.
- Starrett combination square, 6 or 12 inchAmazonIn inches. Choose the size on the page.
- Starrett double square, 4 inchAmazonIn inches.
- Starrett small double square, 2½ inch: the Little BuddyLee Valley · US, CanadaIn inches or in metric.
- The same small StarrettTools for Working Wood · US
- Shinwa mini squareAmazon
- Faithfull combination squares, 6 and 12 inchAmazon · UK
A straightedge
For checking that surfaces and edges are straight, at lengths beyond the rules of our squares (which are straightedges too). The rule of the 12 inch square is enough for most of what we need, but it's very good to have a long one within reach.
The good, expensive ones are heavy steel. Mine is a 24 inch Veritas. There are far cheaper aluminum ones that absolutely do the job, and I have one of those too, a yard long.
It's a great help for seeing where the hills and the hollows are in the board in front of you, so you know where to put the plane.
Where to buy- Aluminum straightedge, 38 inchAmazon
- Veritas steel straightedgesLee Valley · US, Canada
A fine saw
A Japanese dozuki does the job: for cutting joints, for cutting parts to length, and for general use. I like the lightness and the thinness of the Japanese saws. Your hand is close to the wood, and the cuts are clean. You can add a larger Japanese saw without a stiff back, for cutting big planks down into shorter lengths.
Mine is the Extra-Fine Dozuki from Lee Valley. An excellent saw, not very expensive, with the thinnest, cleanest cut I know. It's especially good for dovetails.
Another sweet and really cheap option, which I added to the shop recently for my students, is a little saw by Zona. I used one in my time in Canada and remembered it fondly. Small and compact, comfortable in the hand, and good for small cuts and small dovetails. It's rather slow, though.
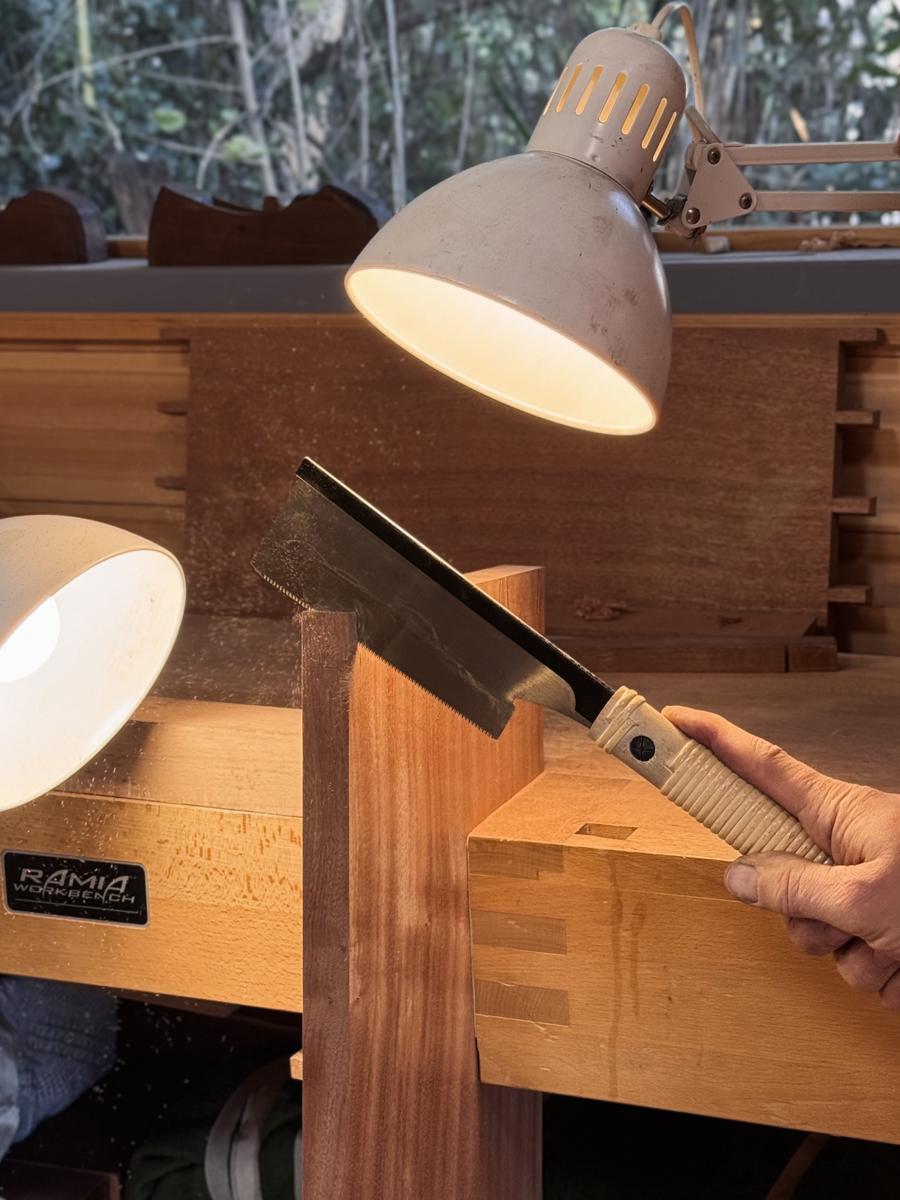
- Extra-Fine DozukiLee Valley · US, Canada
- A simple dozuki, 150 mmAmazonAn alternative to the one above.
- Zona sawAmazon
The marking gauge
Excellent for marking exactly where a joint will be cut, especially a mortise and tenon. It leaves a physical groove, and on the last pass the chisel drops right into it. I also use it to score the edges of a rabbet or a groove before it goes to the router, so the fibers don't break out past the line.
Veritas makes a very good one, and it's relatively cheap, though the cutter needs a good sharpening before you use it. I use the Tite-Mark, made by Glen-Drake Toolworks in California. An excellent tool.
There are cheap alternatives that do the job. I haven't tried them, so I can't recommend a particular one.
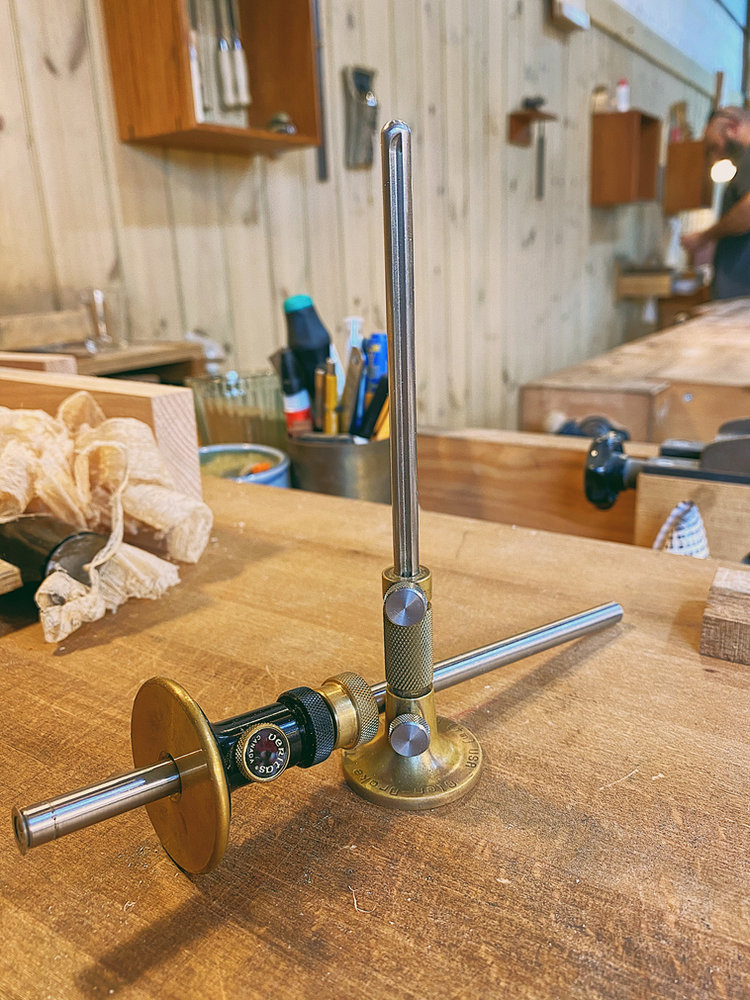
- Veritas wheel marking gaugeLee Valley · US, Canada
- Tite-Mark marking gaugeLie-Nielsen · US
- Tite-Mark marking gaugeTools for Working Wood · US
Files
I'm very fond of flat Habilis files, a Swiss pattern that comes close to a finishing cut and still removes material at a decent pace. One small and one larger cover most of what I need. I also keep a very fine finishing file, for the last touch on the corners of hard woods. It doesn't hurt to have one coarse file and one or two round ones around as well.
All in all, files aren't central to my way of working. But there are moments when one is a great help.
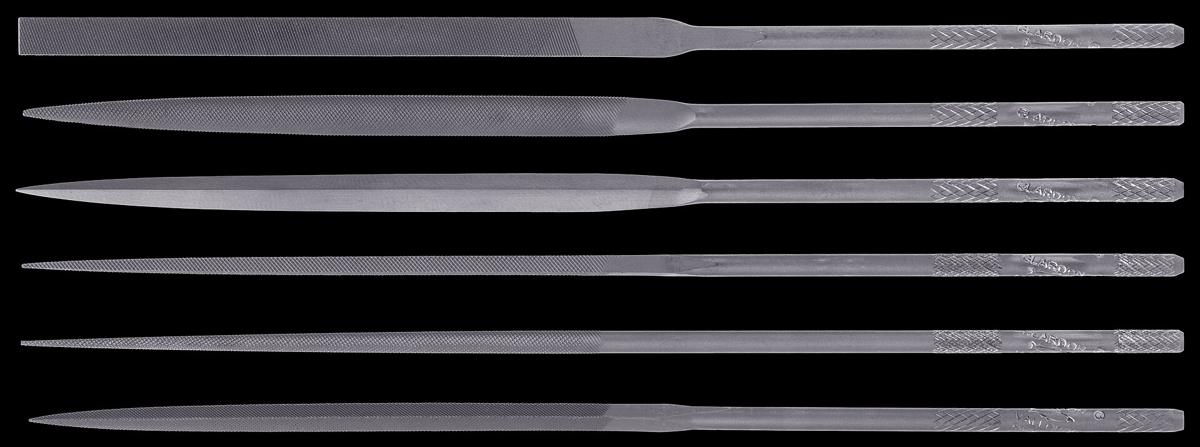
- Habilis hand file, 8½ inchOtto Frei · US
- Habilis files, set of five shapesOtto Frei · USUseful in all sorts of special situations, carving above all.
The spokeshave
I hesitated over this one, because I'm not sure it belongs on a basic list. But if you plan, at any stage, to work on something with a curve, it's a must. Think of it as a plane with a very short body and a handle on each side, which lets it flow along a curve. An ordinary plane isn't much good with curves, and certainly not with inside ones.
I have Lie-Nielsen's small bronze spokeshaves, simple and much loved, with no adjusting screws. A few taps on the bench and you're where you want to be. They're tools of high quality, and wonderfully comfortable in the hands. There's one with a flat sole, for outside curves and for inside ones, and one with a curved sole for the tighter radii the flat one can't reach. I have both.
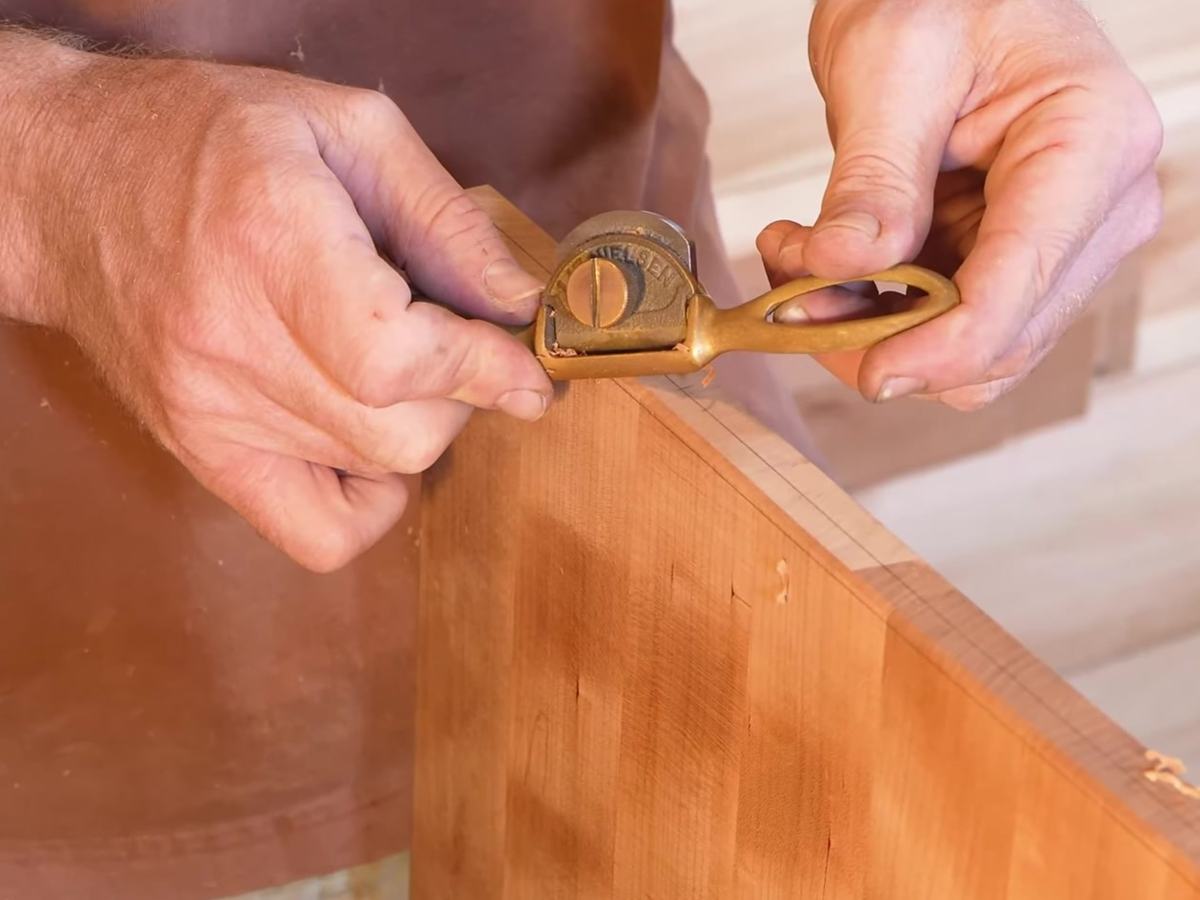
Dictum in Germany makes a decent one in a different style, with two adjusting screws that take some getting used to. Veritas has premium versions that I haven't worked with much, only here and there with students who bought them.
There are far cheaper ones too. Those I recommend less, unless you have a lot of experience. A cheap spokeshave usually needs all sorts of preparation before it will work, and when you're starting out it's hard to notice everything that needs doing, or to do it right. Even then the tool may not be comfortable to use. In short: buy something good if you want to enjoy it.
Where to buy- Lie-Nielsen small bronze spokeshave, flat soleLie-Nielsen · US
- Lie-Nielsen small bronze spokeshave, curved soleLie-Nielsen · US
- Veritas flat spokeshaveLee Valley · US, Canada
Clamps
In a sense these belong at the top of the list, because our work simply isn't possible without a way to hold things in place, firm and steady. For the everyday work on the wood, and of course for glue-ups of every kind.
Broadly, I use two families: pipe and bar clamps, for gluing up panels from several boards, and classic clamps, which suit most other situations. There are divisions and subdivisions, and makers with different emphases. What matters is that the clamp does its job, stays where you put it, is comfortable to use, and lasts. This is a tool that works hard.
These are the kinds that almost all my work relies on.
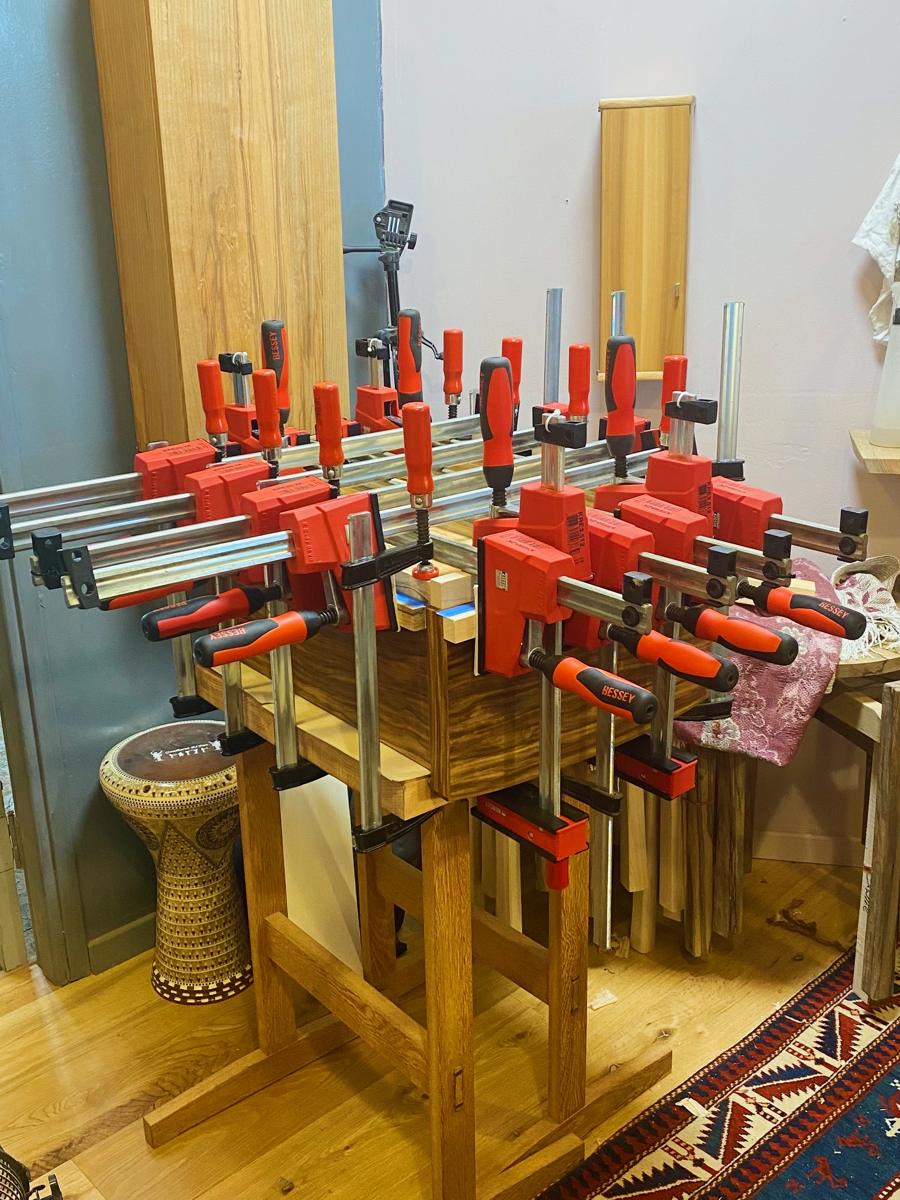
Bessey K Body
Not an obvious first choice. But once you've worked with these clamps, there is almost no substitute. They do the work of a bar clamp and of a regular clamp.
I use the K Body REVO.
Where to buy- Bessey K Body REVO, single clampsAmazonEvery length is on the same page. Choose the one you need.
- Bessey K Body REVO kit: two 24 inch and two 40 inchAmazon
Classic F clamps
A small collection, in a few sizes, is close to essential for the situations that will, sooner or later, come up. Here too Bessey has good options. I have all sorts of theirs, and I'm happy. They come in different sizes and in light, medium and heavy duty.
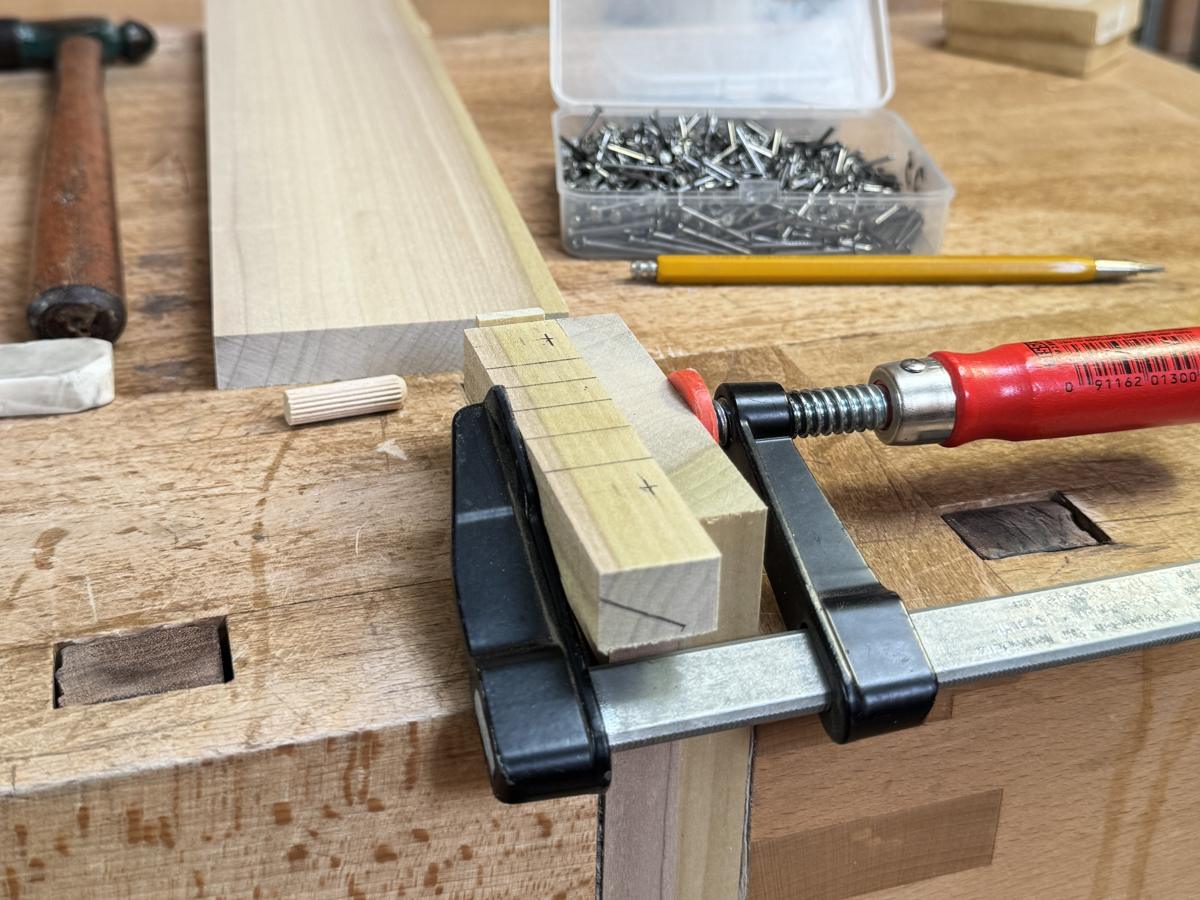
- Bessey F clamp, 12 inchAmazonThe same page has the other lengths.
Pipe clamps
A set of two parts that you thread and slide onto a steel pipe of whatever length you choose. Get the version for ¾ inch pipe, and buy the pipe at your local hardware store. Good for gluing up panels, and very handy for gluing joints between boards, dovetails or dowels, when you don't need much depth. Bessey does excellent work here as well.
Where to buyDubuque bar clamps
Perhaps my favorite clamps of all. They are simply so well made, they look good, and they're a pleasure to work with. Excellent for gluing boards into panels, for gluing on edgings, and for plenty more.
I carried ten of them home from a visit to Germany, and had to take them apart to fit them into my suitcase. They're made in Iowa, so you have it easier than I did. Even with ten of them on the wall, I'm tempted to order more.
Where to buy- Dubuque aluminum bar clamp, 24 inchAmazon
- Dubuque aluminum bar clamps, all lengthsLee Valley · US, Canada
Klemmsia wooden clamps
Simple clamps, and easy to use. They don't have the force of a good metal clamp, but I find myself reaching for them more and more these last few years: for delicate glue-ups, for holding a part to the bench quickly and lightly, and so on. It's worth having at least two.
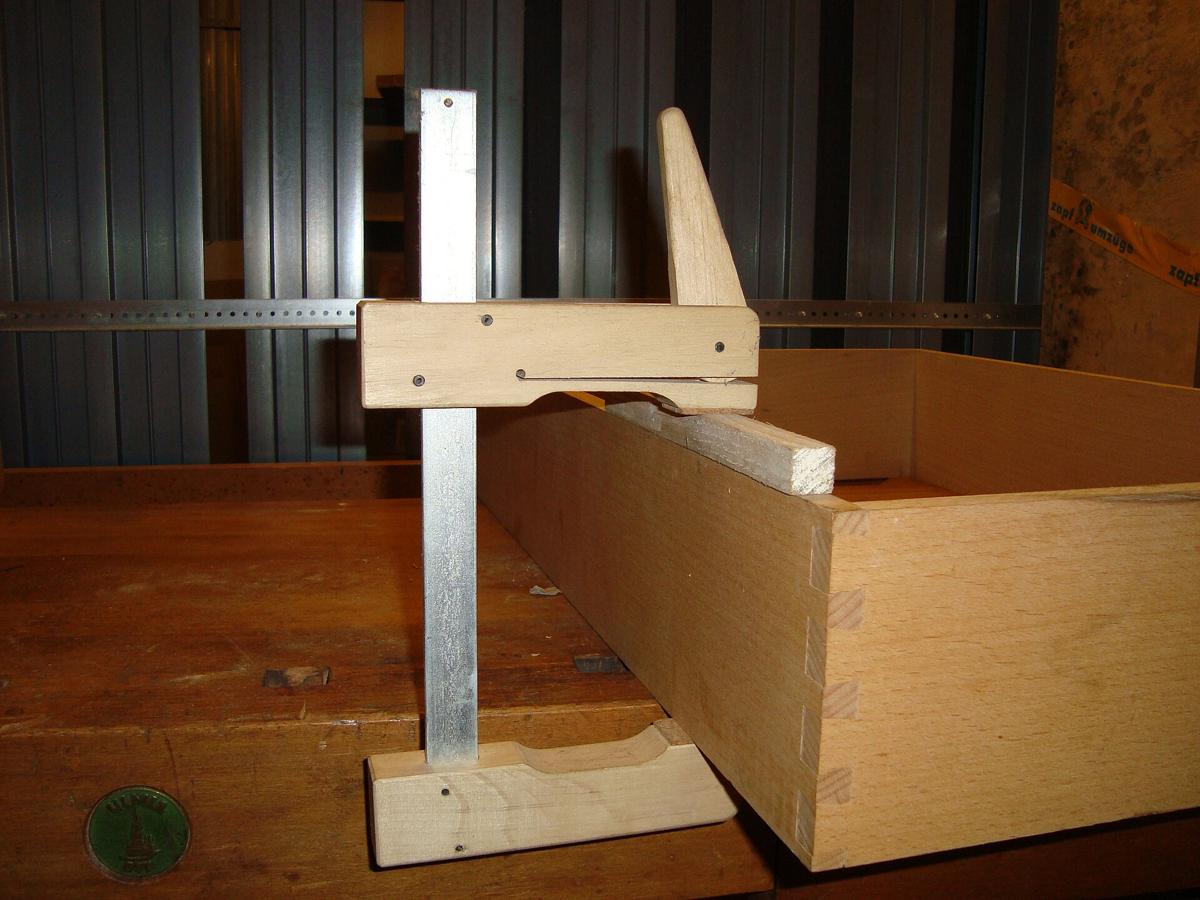
- Klemmsia wooden cam clampsHighland Woodworking · US
You've watched
a thousand videos.
Have you had a single lesson?
Everything I know is free on YouTube. What you can't get there is someone to look at your work and tell you the truth about it.
Join the list + free course →Pencils, tape and sandpaper
A 2 mm lead holder, and its sharpener
Why is a pencil on a list of tools? Because good work begins with accurate marking. The fine point, which you can extend as far as you like, lets you mark exact positions for joints. I use it all the time. For dovetails I can't replace it: you can push the lead out quite far, to reach the places that are hard to mark when you transfer the joint from one board to the other. I use 2B lead. Not too soft, not too hard.
I recommend the Staedtler specifically, because its own sharpener gives the best and most consistent point, compared with the simple ones.
Besides that, I like a 0.9 mm mechanical pencil for marks that needn't be as precise but must be easy to see, like a line I'll cut next to on the bandsaw. And an ordinary soft pencil, 5B or 6B, for scribbling all over a surface before planing. That way I can follow where I've touched and where I haven't, whether I'm planing by hand or by machine.
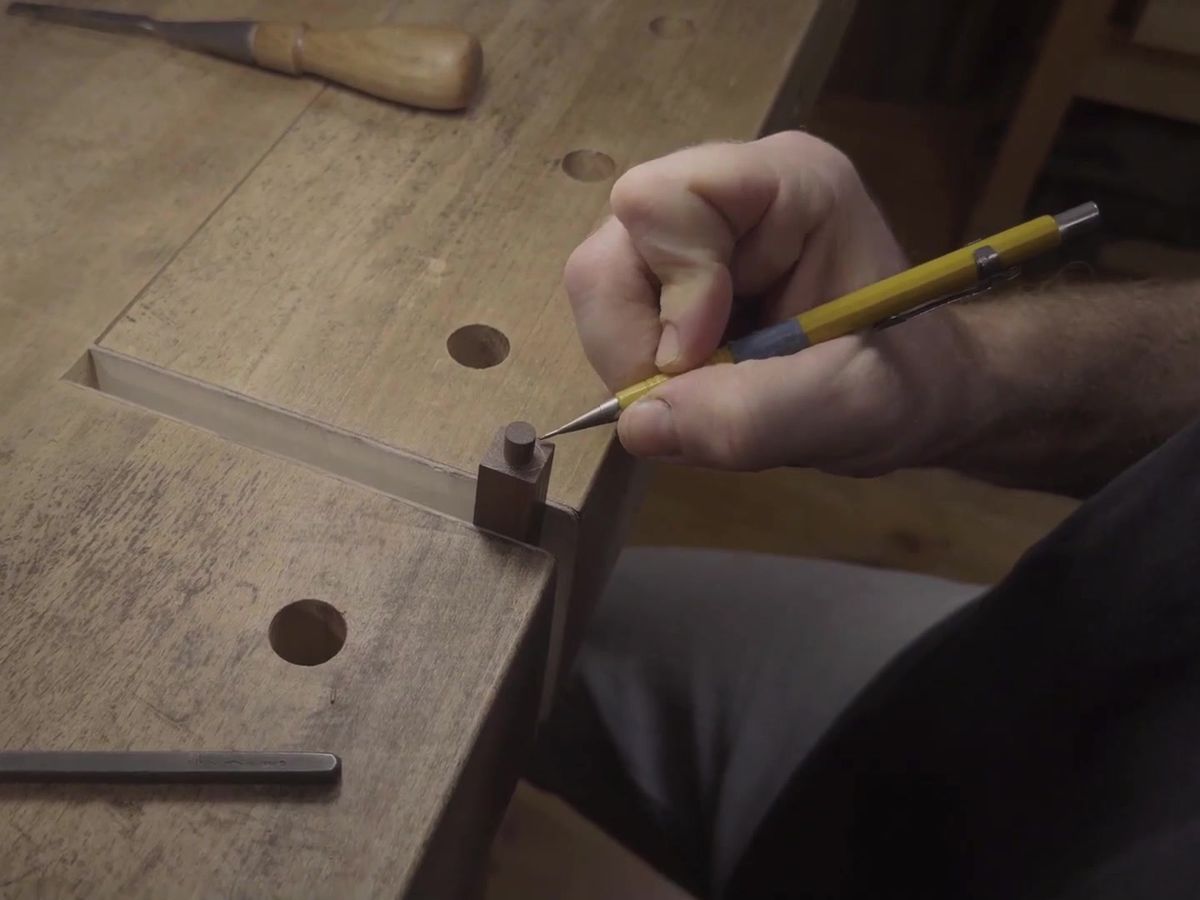
- Staedtler Mars Technico lead holder, 2 mmAmazon
- Staedtler lead pointerAmazon
- Staedtler 2 mm leads, 2BAmazon
- Pentel mechanical pencil, 0.9 mmAmazon
- 6B pencils, box of twelveAmazon
Blue tape
Blue painter's tape from 3M. Excellent for marking, for masking before a finish, for gluing (its stretch makes it a clamp of a kind), and simply a pleasure to use. It even smells nice. In my student days in Canada we couldn't live without this tape, or without the double-sided tape below. Beware of imitations of both.
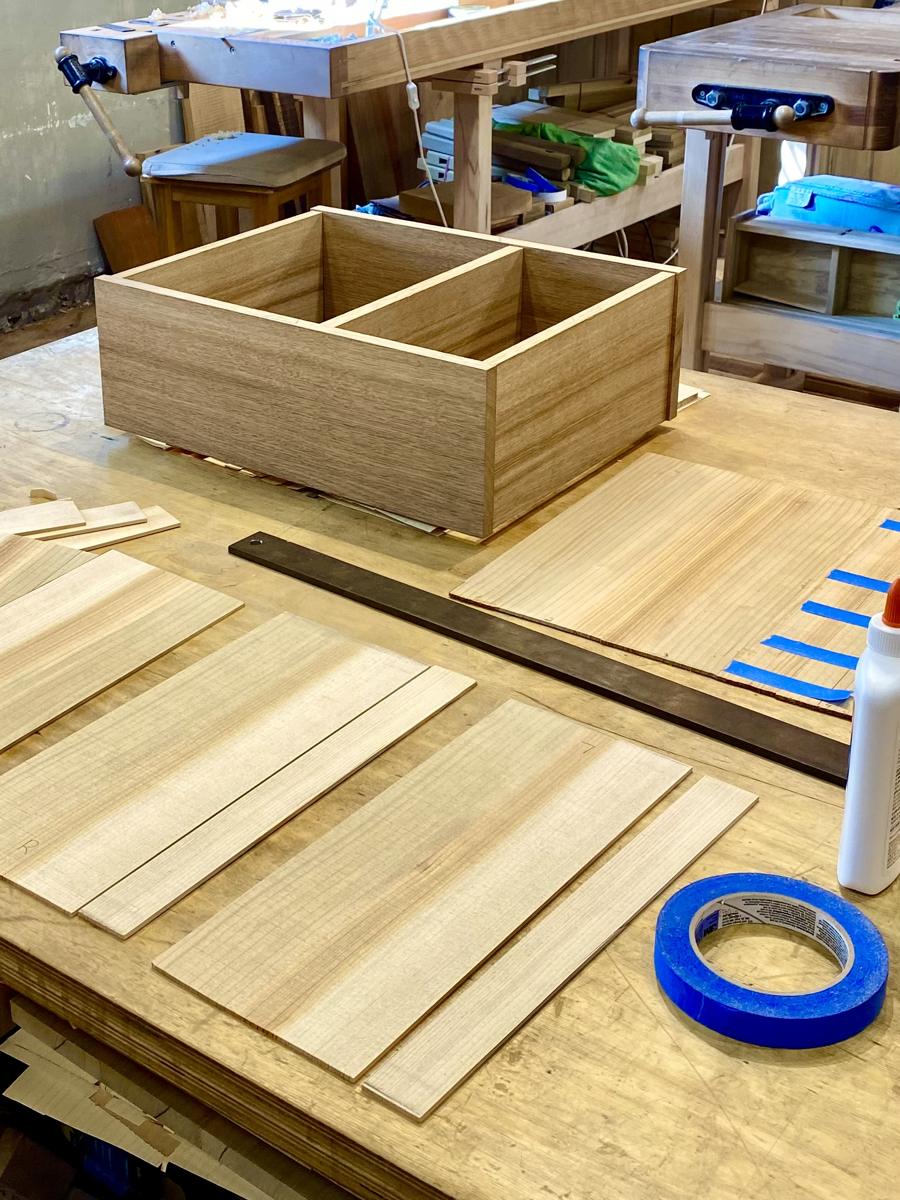
- ScotchBlue painter's tape, 1 inch, four rollsAmazonFour rolls will last you a long time.
Double-sided tape
The one by IPG. This one specifically, because it's strong and reliable, it cuts easily, and it comes off without leaving marks. Excellent for fixing parts in place for a while, especially for operations at the machines.
Where to buy- IPG double-sided tape, 1 inchAmazonThe width I use most.
- IPG double-sided tape, ¾ inchAmazon
- IPG double-sided tape, 2 inchAmazon
Adhesive-backed sandpaper, on a roll
I think of this as a tool in its own right. Its thickness is very even, so when it's stuck down on something flat, you can trust that flat is exactly what you'll get. Very useful for flattening the soles of planes, and for flattening blades when they first arrive. In the woodworking itself there are all sorts of operations where it really helps, when planing by hand would be too hard or too fiddly to be worth the effort.
I recommend only 3M. It costs a little more, but it lasts a very long time if you use it wisely and keep the pieces in a box, away from the dust. Their blue series is really good, and long-lived. These are the grits that serve me well.
Where to buy- 3M Stikit Blue, 180 gritAmazonThe one I use most. A good balance between speed and a reasonable surface.
- 3M Stikit Blue, 80 gritAmazonFor fast, coarse removal that is still very flat.
- 3M Stikit Blue, 320 gritAmazonA good grit in between, on the way to a finish.
- 3M Stikit Blue, 600 gritAmazonNot a bad finish. One stop before 1500 paper if you want to go further, but it can be enough on its own.
Finishes
Skipping ahead to the end of the work: a few words on the finishes I like. I'm quite a minimalist here, and I don't claim to be a great expert on finishing. But I can share what works for me.
Oil
For years I was, and still am, a fairly steady user of Danish oil: a blend of linseed or tung oil with thinners and driers. Tung and linseed oils on their own are thick, and take a long time to cure and harden. Recently I ordered a gallon of Tried & True Varnish Oil from Amazon, linseed oil and pine resin, and it's very good. Honestly, with oils it doesn't matter much: many of them feel the same to me, and some kind of Danish oil mix will do. Just not inside a closed space, like a cabinet or a drawer.
I've heard Osmo is good too, but I've never tried it myself.
Then there is Odie's. Strong, and simple to apply, though a bit expensive. There is the classic oil, and then all sorts of variations. These are the ones I use.
Where to buy- Tried & True Varnish OilAmazonThe one I use. The page has smaller cans as well as the gallon.
- Odie's Oil, the starter kitAmazonComes with pads for applying it and white towels for wiping off.
- Odie's DarkAmazonThinner, and darker.
- Odie's WaxAmazonA hard paste, somewhere between an oil and a wax.
- Osmo Polyx-OilAmazon
Shellac
A traditional finish, delicate and beautiful. It gives basic, minimal protection, and lets the wood stay wood, with no sense of a coating lying over it. You can also build up many layers and do what is called French polishing, for the deep gloss of so much traditional old furniture. I use it only as a minimal finish.
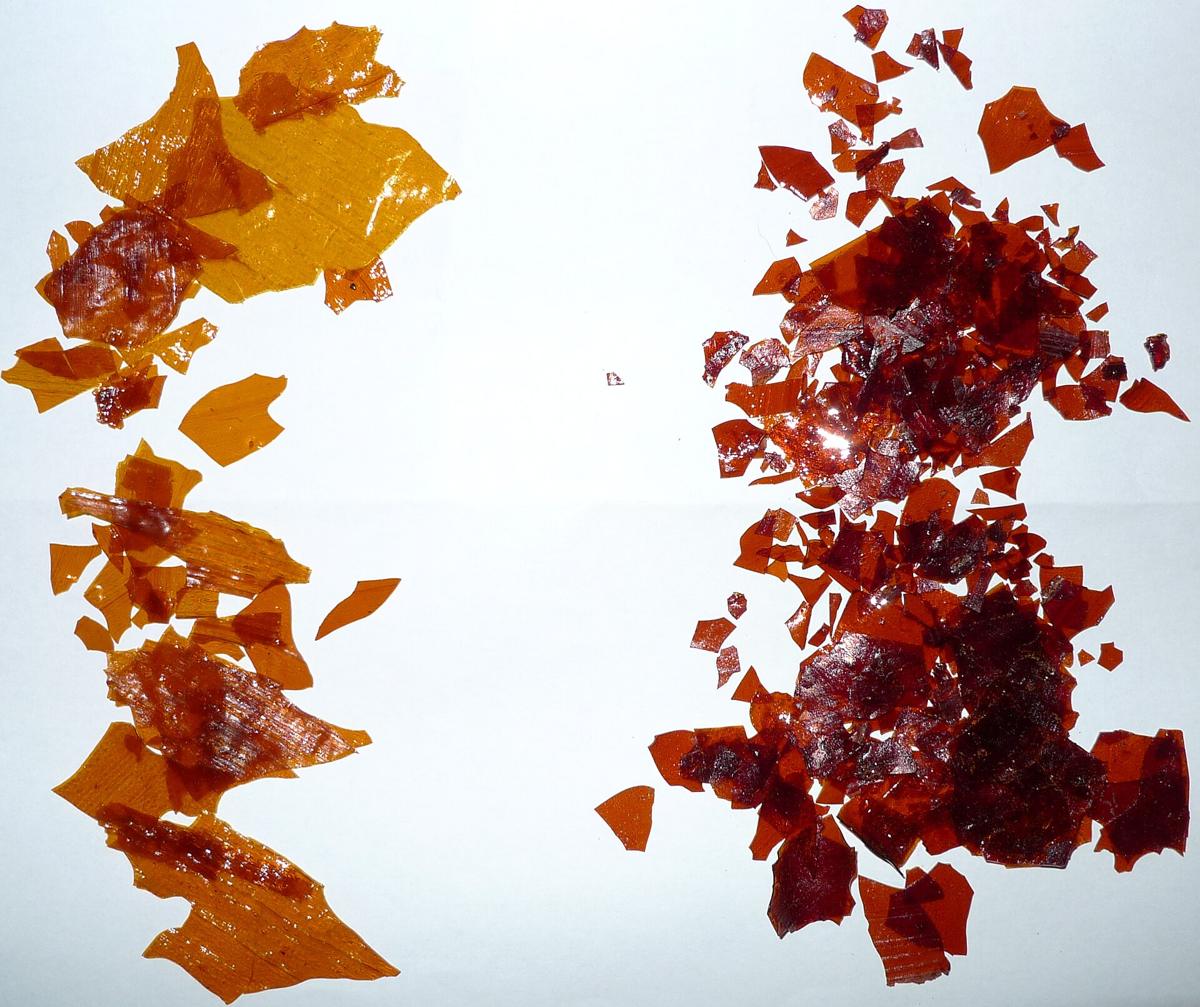
Shellac is made by an insect. It's dried and sold as flakes, which you dissolve in denatured alcohol or high-proof grain alcohol. It comes in several shades. I use and recommend only blonde, which changes the natural color of the wood least. Of course this is a whole world, and everyone will do as they see fit.
Wax
There is a wonderful wax we used in Canada, Clapham's, made by a family there. We used it as a minimal finish too. It won't protect a table or a chair, but it's excellent for small cabinets and for inside surfaces. It's a very matte finish, though you can build up a few layers and buff them to a shine.
The truth is that I use it mostly as a barrier against glue, in the corners of a piece, so that the glue that squeezes out comes away easily once it's dry.
Where to buy- Clapham's beeswax furniture polishRockler · US
- Clapham's beeswax polishThe maker · Canada, ships to the US
- Beeswax polish, made in CanadaLee Valley · US, Canada
One book
All right, this isn't exactly a tool. But I can't imagine my work without the teaching of James Krenov. Maybe it is a kind of tool?
His first book is monumental. Not in its length, but in what it means: it is about the why, not the how. And when the why is clearer, the how takes shape as well. It improves, and it comes into focus.
Where to buyWhere to buy
Apart from Amazon, these are the shops I'd look at. Each carries a different collection and different makers, so it's worth exploring them all before a big purchase.
- Lie-Nielsen Toolworks, Maine. Their own planes, chisels and spokeshaves.
- Lee Valley, Canada, with shipping to the US. Veritas tools, Hock blades, and a great deal more.
- Tools for Working Wood, Brooklyn.
- Highland Woodworking, Atlanta.
- Classic Hand Tools, England. I've bought from them several times.
- Axminster Tools, England.
- Workshop Heaven, England.
- Dictum, Germany.
That's it for hand tools. Machines deserve an article of their own. If something seems basic and important to you and it isn't here, or you're unsure about a tool you own or are about to buy, write to me at refael@cedrusschool.com.
Now go and work some wood. And maybe we'll meet one day, somewhere along your way.
RafaelWhat I took from my years at Inside Passage wasn't a list of tools. It was a way of deciding: which surface matters, when a joint is good enough, why you'd cut by hand something a machine could do faster. That is what the films are for.
- TodayThe Plane course, free, with my feedback on your work.
- New filmsA new film in your inbox every time it goes live.
- When the school opensYour invitation first. Places are limited.
You're already on the list. Come in →
Every link on this page was checked in October 2026. If one has died, please tell me. The photographs are mine, except the few marked "Not mine", which are credited where they appear.